Rhubarb Tarte Tatin

You can never have too much of a good thing, they say. Well, that’s complete rubbish. It took me about 2 years to start drinking Earl Grey tea again after months of several cups a day and I still haven’t been able to recover a taste for baked potatoes with cheese.

And rhubarb? Well, I’m not quite sick of rhubarb crumble yet, but I’ve definitely had my fair share of it over the last year. It was time to try something different. You see, stewed rhubarb is alright, but rhubarb roasted in butter and sugar is a lot better. And you could top it with crumble, but why do that when you can have a flaky, buttery puff pastry base instead?

I first saw this on Masterchef, when Marianne cooked it and the judges absolutely loved it. It looked brilliant, but all the recipes I found on the internet used a frying pan to caramelise the rhubarb and then cooked it in the oven. My frying pans don’t really survive in the oven, and I was worried that if I used the roast-for-3-hours technique the rhubarb would disintegrate into a pink mushy mess. As it turns out, rhubarb does survive hours of roasting. And tastes amazing after.

Rhubarb Tarte Tatin

Ingredients

4 large stalks of rhubarb, chopped
100 gr butter, softened
150 gr caster sugar
a sheet of puff pastry

In a round pyrex dish, about 20 cm in diameter, spread the butter as evenly as you can and sprinkle the sugar on the top. Arrange the chopped rhubarb in circles, making the bottom as pretty as you can, as it will be on the top later. If you have any extra bits, cut them smaller and sprinkle them over the top.

Cover with foil and bake in the oven for up to 2 hours at 180 degrees, checking towards the end to make sure the bottom doesn’t burn. Roll out a sheet of puff pastry and cut it in approximately the shape and size of your dish. Place it on top of the rhubarb, tucking the ends in, and bake until the pastry is cooked.

Let it cool for a few minutes, place a plate on the top and quickly turn it upside down.

My pieces of rhubarb made a bit of a mess, but I quickly rearranged them and made it almost presentable. I loved the fact that there was some soft, juicy rhubarb but also enough caramelised bits too. The extra syrup dripped on the pastry and made the edges shiny and sticky. I served it with a scoop of vanilla ice cream.

Rhubarb and Pear Frangipane Tart

I wonder how many times other food bloggers make a dish, find a few minutes to take half-decent photos of it despite the urge to forget about blogging and just tuck in and then… just never write about it. I’ve got so many sets of photos that I was actually quite happy with, of food that tasted good and I still never found the motivation to put up here.

This is what happened with this one. I’ve made a Pear and Frangipane Tart and a Caramelised Pear and Almond Cake before but now I’m quite glad they never made it onto the blog. Because this is better.

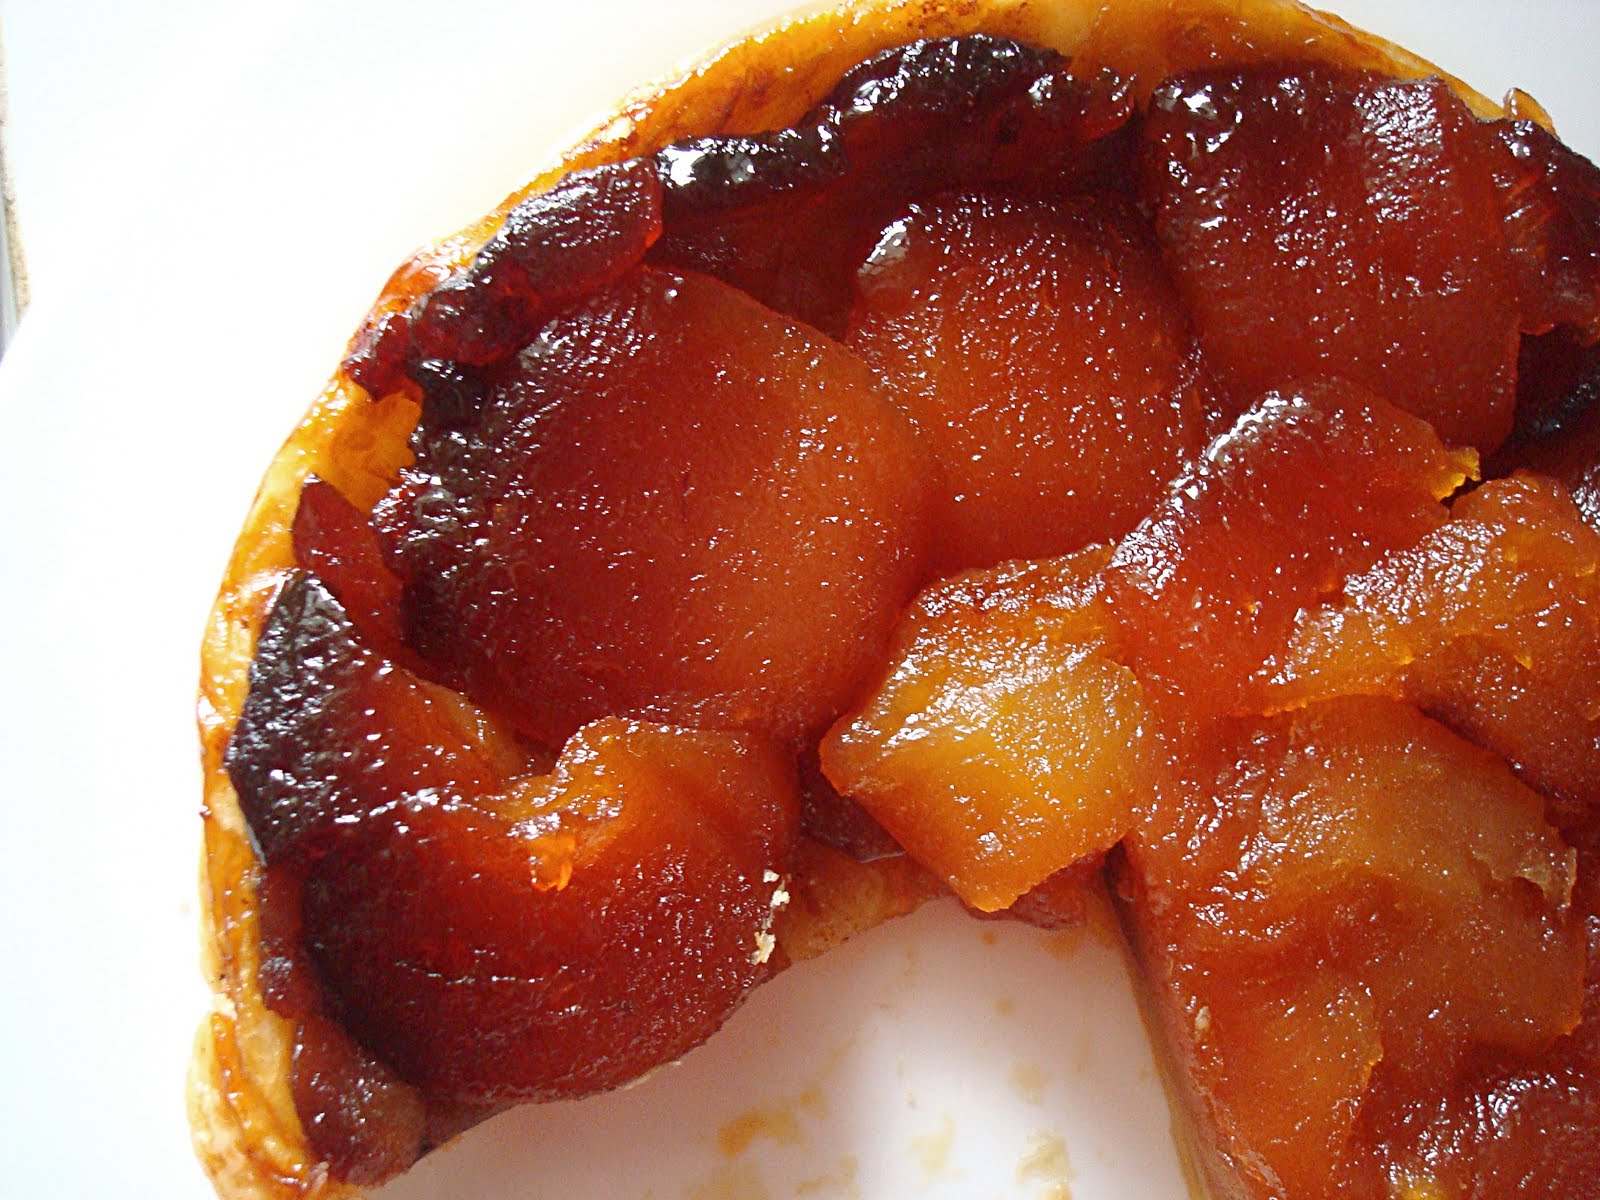
You see, not only I made my own pastry, which already makes it a winner, it also contains alcohol, which is always a plus (even is such small quantities!) and it has an extra layer of goodness between the pastry and the frangipane: sweet and sharp rhubarb compote.

Now, I can pretend it was my culinary genius that made me put rhubarb in the tart but, in reality, I had half a bowl of the stuff leftover and I couldn’t possibly bring myself to eat any more rhubarb yogurt. And a bit like this, the Rhubarb and Pear Frangipane Tart was born!

I’ve combined several recipes that I have used in the past and I think this works quite nicely. The rhubarb is sharp, the almond filling sweet and nutty and the tart crust crumbly. If I could change one thing, it would be the way I prepared my pears. Next time, instead of just popping them on the top and drizzling with sugary butter, I’ll caramelise them first on the hob to make sure they are soft by the time the tart is cooked.

Rhubarb and Pear Frangipane Tart

For the crust (from Chocolate and Zucchini):

85 gr chilled salted butter
85 gr sugar
170 gr all-purpose flour
1 tsp white wine vinegar
1 tbsp cold milk

Combine butter and sugar in a food processor until light and fluffy. Add the flour and mix until you get a crumb-like dough. Add the vinegar and the milk and pulse to incorporate.

At this point the dough should have crumb-like consistency (check!), but clump if you squeeze it together in your hand (check!). And also, smell pretty disgustingly of vinegar (check…). I believed Clotilde when she said that the smell would disappear during baking and proceeded happily.

Empty the dough crumbs in a tart dish (or a cake tin which is what I did) and spread evenly along the bottom to form a crust. Keep some extra along the edges to mold it into a low rim. Do not worry too much about making it completely even. Blind-bake it in a 170 degree oven for 15 minutes and let it cool slightly.

For the rhubarb compote:

2 stalks of rhubarb, washed and chopped
a drop of red wine
dark muscovado sugar to taste

Cook the rhubarb and the wine on the hob until the rhubarb is soft. Add sugar to taste and continue to simmer until all lumps of rhubarb have been mixed in and you have a smooth paste. Spread evenly onto the pastry.

For the frangipane filling (adapted from here and here):

75 gr butter
75 gr dark muscovado sugar
75 gr ground almonds
1 large egg
2 tbsp flour
2 tsp Amaretto (alternatively, use a drop of almond extract or omit completely)

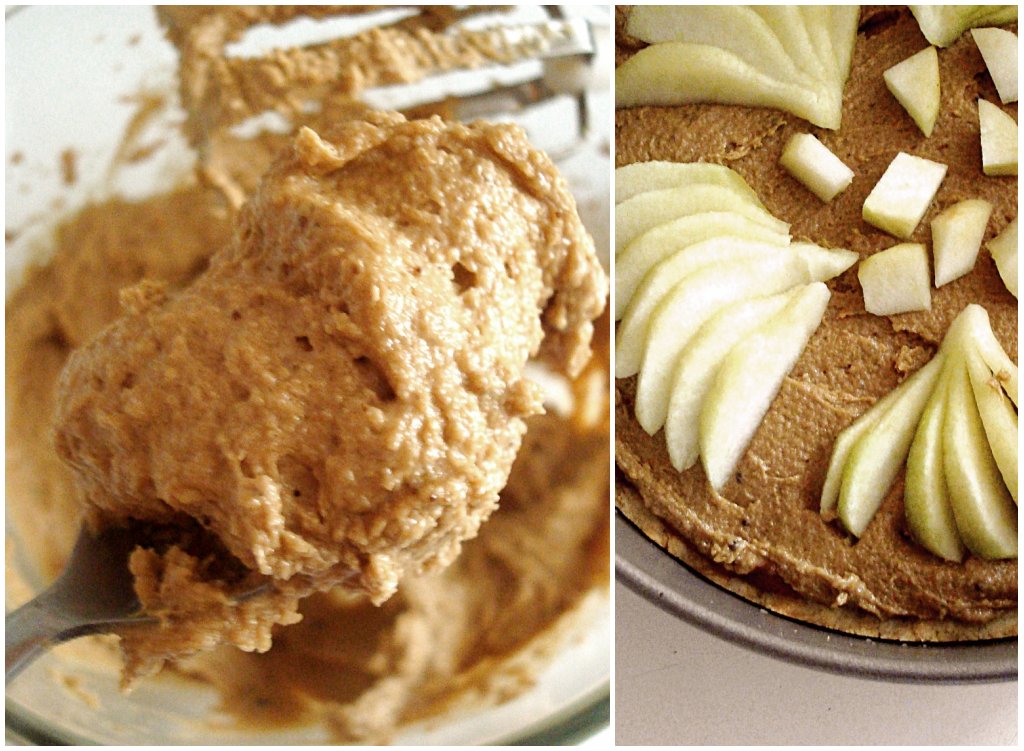
Mix all the ingredients together in the food processor or by using an electric hand whisk until smooth. I didn’t worry too much about a few small lumps of brown sugar. Spread on top of the rhubarb compote.

For the topping:

2 pears
50 gr butter
a sprinkle of sugar

Peel the pears and slice them in quarters, removing the hard middle bit. Keeping the thin top intact, slice them to the bottom and fan them out. Arrange on top of the frangipane. Melt the butter with the sugar.

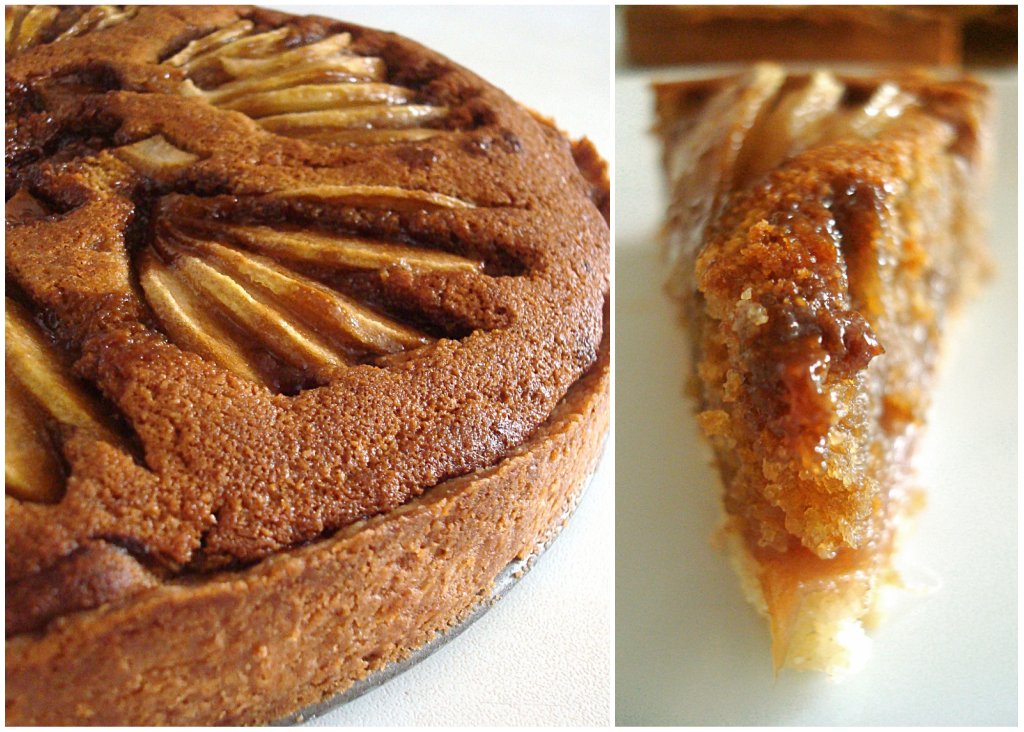
Cook in a preheated oven for 15 minutes at 170 degrees, then take it out and quickly drizzle the melted butter over the pears to stop them from drying out. Place back in the oven and cook for a further 20 minutes or until the frangipane mixture is set and the crust golden-brown.

If you prefer, you can caramelise the pears in a pan before arranging on the tart and avoid the butter-drizzling half way into the baking. Or maybe ignore this step completely. The pears should be fine, especially if they were quite juicy to start with.

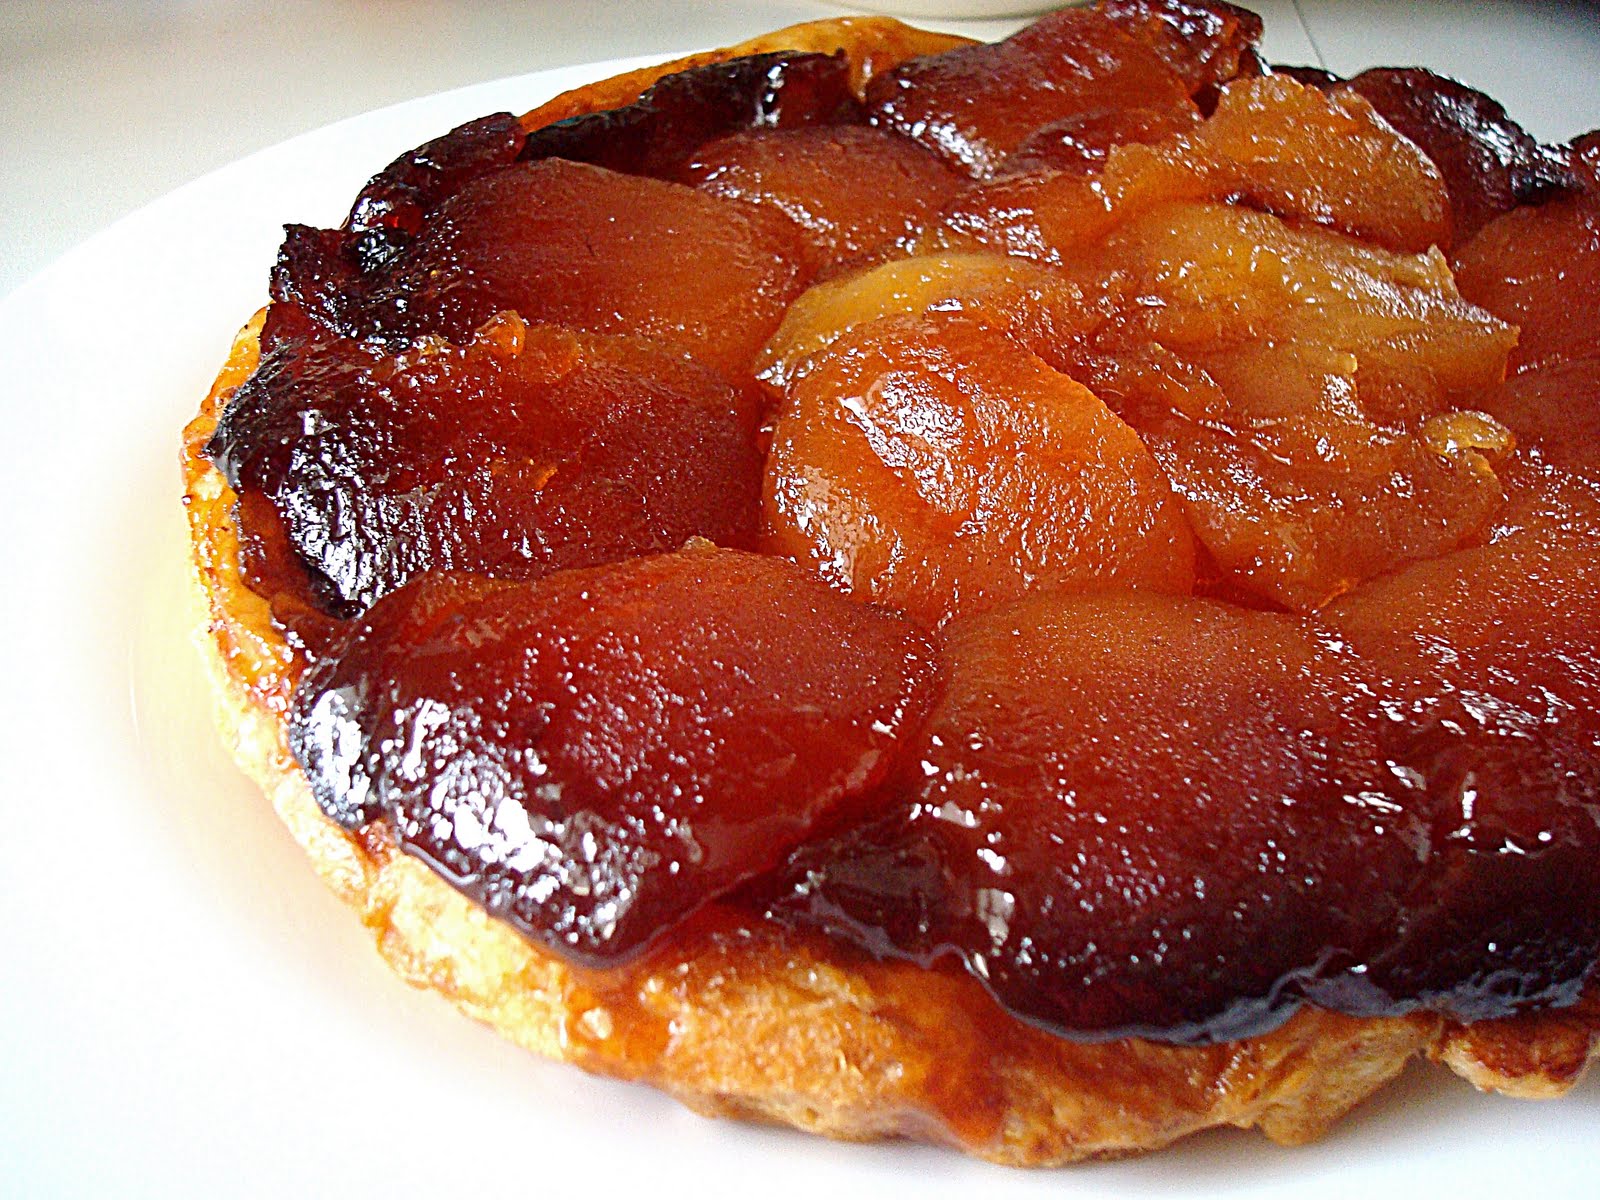
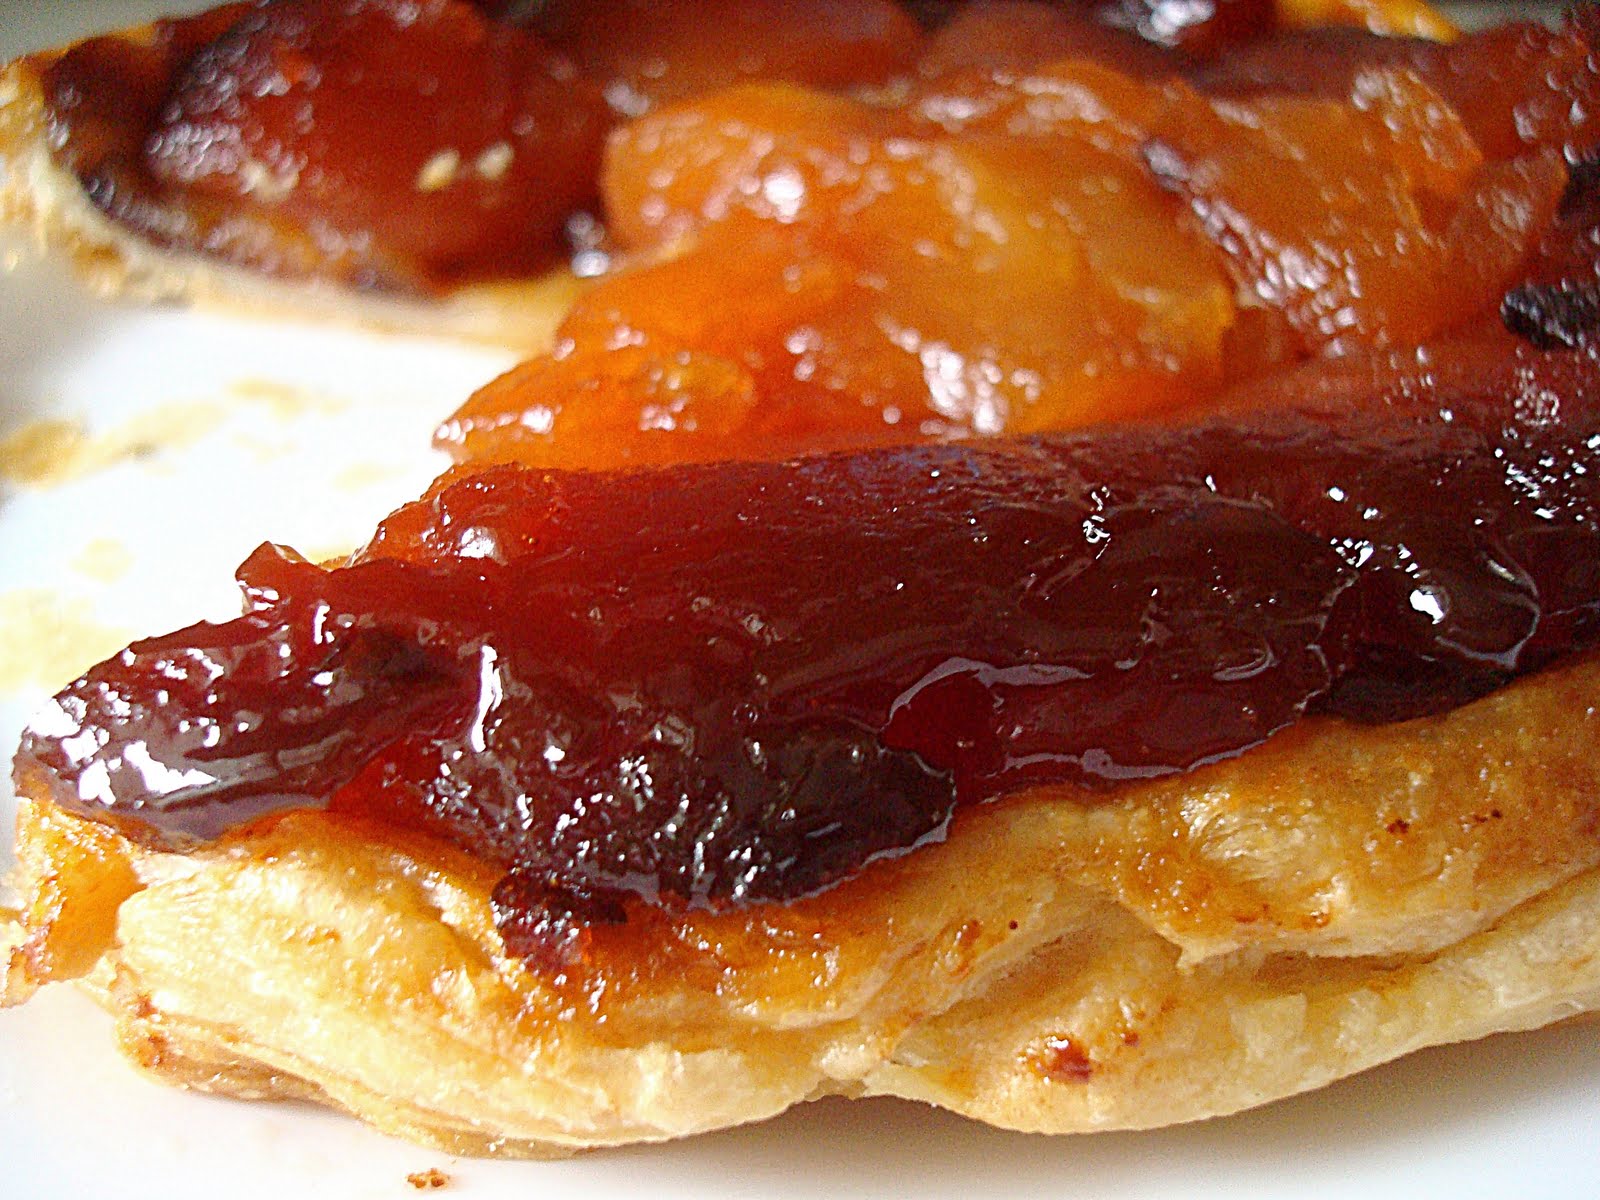
When it’s done, remove the tin’s ring and let the tart cool. You can serve it while it’s still warm but I find that the flavours improve after it’s cooled down. Serve with vanilla ice-cream or clotted cream. Even though I had already had quite a lot, I couldn’t resist a slice of it plain, with a cup of tea in the afternoon.

I know the recipe looks a little bit long but it really isn’t very complicated at all and it takes very little time. If you want to make it quicker you can use ready-made sweet shortcrust pastry, although making your own is pretty easy and the taste and texture is almost certainly superior to the store-bought. You can make both fillings while the pastry is blind-baking and cooling down, do your clearing up while the whole thing is baking and then you’re ready to enjoy a lovely slice of tart, sweet, nutty, fruity goodness.

Apple Tarte Tatin

I absolutely love apple desserts: apple crumbles, apple pies, apple tarts. Saying that, it is weird that I only discovered tarte tatin when, a couple of years ago, I got a French (almost) housemate. She loves cooking too, and one evening she produced the best apple tart I had ever tasted. How had I not thought of this before? Caramelised apple tart. The perfect dessert? Possibly.

I didn’t try it to make myself though. It always seemed a bit of a faff to be honest, and everyone who made a tarte tatin on Masterchef (and Masterchef is never wrong) used some kind of fancy equipment or made it look and sound too complicated.

The other day, I had a lot of apples left and it had been a hard week, so we thought we’d cook ourselves a treat. We made some steaks and some dauphinoise potatoes and I made a tarte tatin for pudding. Well, almost. I completely underestimated how long it would take to cook, so we had brownies for pudding and I decided to finish the tarte tatin the next morning.

And this is the only thing that stops this from being the perfect recipe: it takes a while. But it’s completely worth it. Perfectly sweet and soft apples in the middle, sticky at the edges, with crumbly, buttery puff pastry at the bottom for some texture contrast.

Apple Tarte Tatin

Ingredients

6 crisp medium apples
100 gr butter, softened
100 gr caster sugar
250 gr puff pastry

Peel and core the apples and cut them in quarters. Spread the butter as evenly as possible on the bottom of a round oven-proof bowl, with a flat bottom, about 20cm in diameter. Sprinkle the sugar on the top.

Place the apples, cut side up, symmetrically around the bowl. The bottom side is going to be on the top later on, so make it as pretty as you can. When/if you run out of space, slice the rest of the quarters in 2-3 pieces and place them on top of the apples already in the the bowl. It doesn’t matter if these will look pretty as they will end up at the bottom of the tart anyway. 

Cover with foil and cook in the oven at 170 degrees for 1 1/2 hours. Take the foil off and cook for another half hour, making sure the top doesn’t burn.

Roll your pastry in a circle big enough to cover the apples. Place it on top of them (I did that when mine had cooled down, not sure if it makes a huge difference but you’ve been warned) and tuck the ends inside, between the apples and the bowl. With a knife, pierce the pastry in a couple of places to make sure any steam can come out. Cook for half an hour or until the pastry is cooked.

The bottom should now be looking beautifully caramelised. Place a plate on top of the bowl (make sure you don’t burn yourself!) and quickly turn it upside down so that the pastry lands on the plate. The apples should follow.

I was a bit scared of this part but it actually worked fine, almost nothing got stuck on the bowl. Any buttery juice will end up on the pastry, making the edges really sticky. It is genius.

Serve with vanilla ice cream or some creme fraiche. I love it either warm or cold. And now that I know how to make it, it’s my new favourite dessert. It does take time, but you don’t have to do anything as your oven will do all the work. Perfect for a weekend treat or a dinner party as it is definitely a crowd pleaser.